I’m now married!
We had a wonderful wedding, with loving friends and family members, many of which traveled pretty far to celebrate with us. It was a pretty small wedding, but it was a heartfelt one, and we put a lot of effort into things to make it the wedding we dreamed of. In this blog post I’ll cover some of the personal touches we were able to add.
TikZ Place Cards
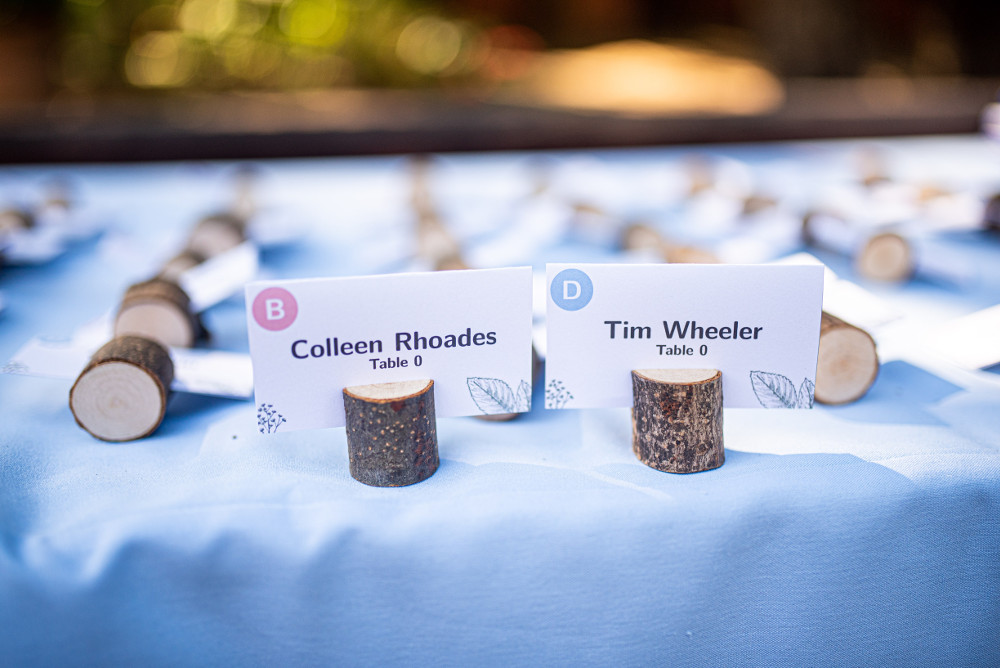
Photo by @wendyandgeorgephoto
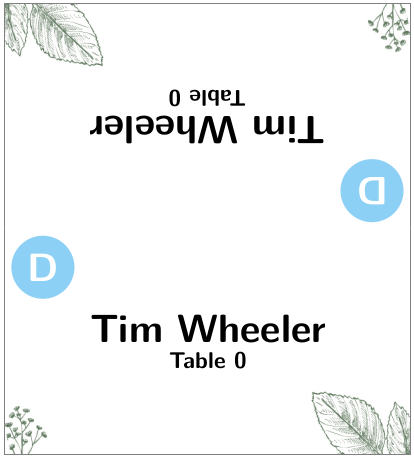
We had guests RSVP via a Google form, which asked them information like their name, which meal they wanted, and whether they had any food allergies. This produces a Google sheet, which I exported to CSV and loaded into a little Julia notebook. My notebook then typeset place cards for each guest, displaying their name, table assignment, meal choice, and any food allergies. This used TikZ via TikzPictures.jl, and inverted each image in order to get a fold-able card:
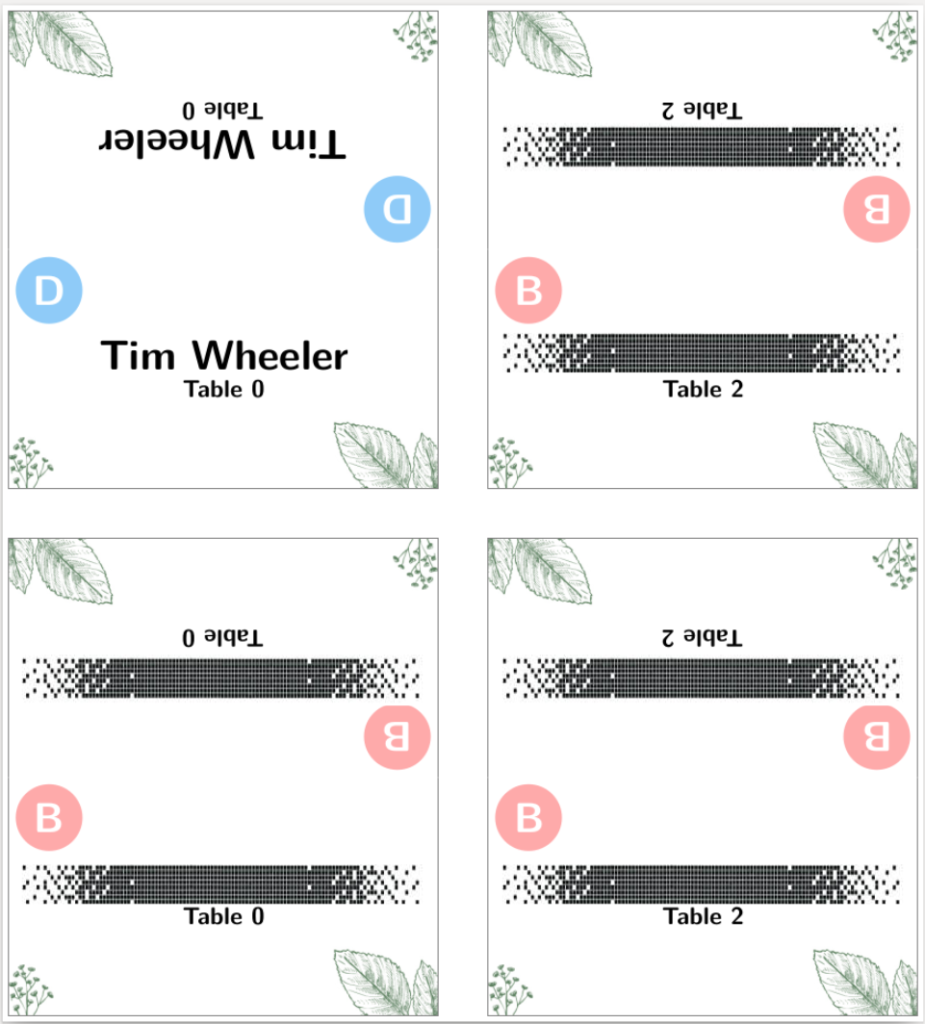
The script did some basic layout to produce paper sheets with multiple cards such that we could print them out with maximum effectiveness:
We had to address some corner cases, such as babies (which don’t have meals), guests with multiple allergies, and guests with long names.
We used the same approach to make a few other place cards for things like the desserts table:

Table Numbers
Each dining table had a number, and we needed a way to indicate which table was which. My partner had a fantastic idea, and made table signs with table numbers that included photos of us at that age. So, table 2 had photos of each of us at 2 years of age, table 3 had each of us at 3 years of age, etc:
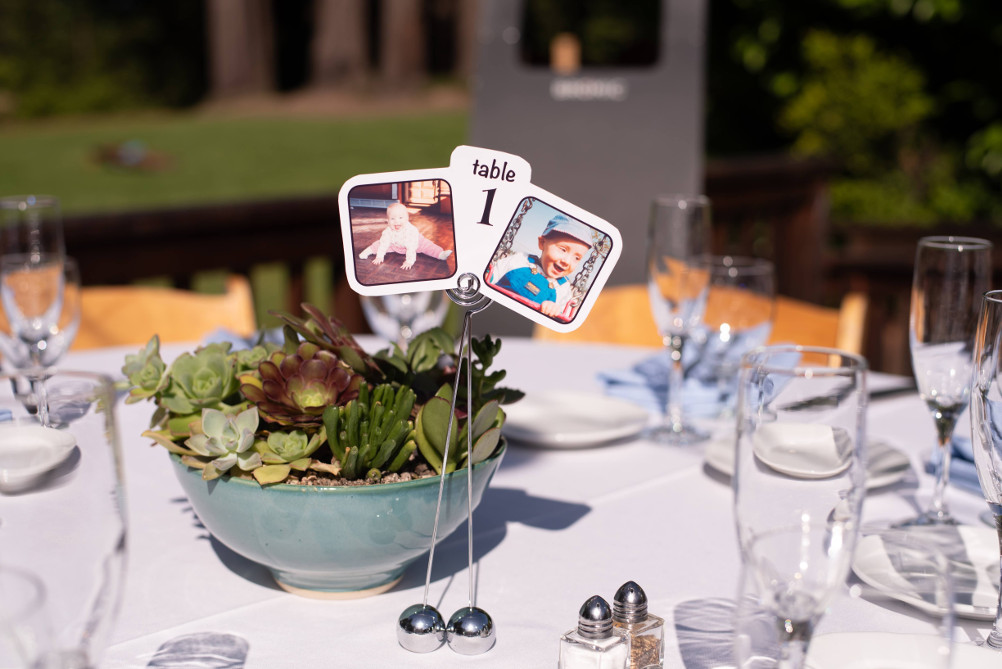
Photo by @wendyandgeorgephoto
These were made in Keynote, and were printed out on photo paper and cut out by hand.
Succulent Centerpieces
We also wanted table centerpieces, but balked at the extreme price of floral arrangements. Again, my partner had a fantastic idea. She had been learning pottery, and decided that she would throw her own bowls, glaze and fire them, and then make succulent arrangements. She gradually worked on these bowls all year, learning to make bigger and better bowls as she progressed, and made some very beautiful works of art. Many of the succulents were clippings from my mom’s garden. The end result was amazing!
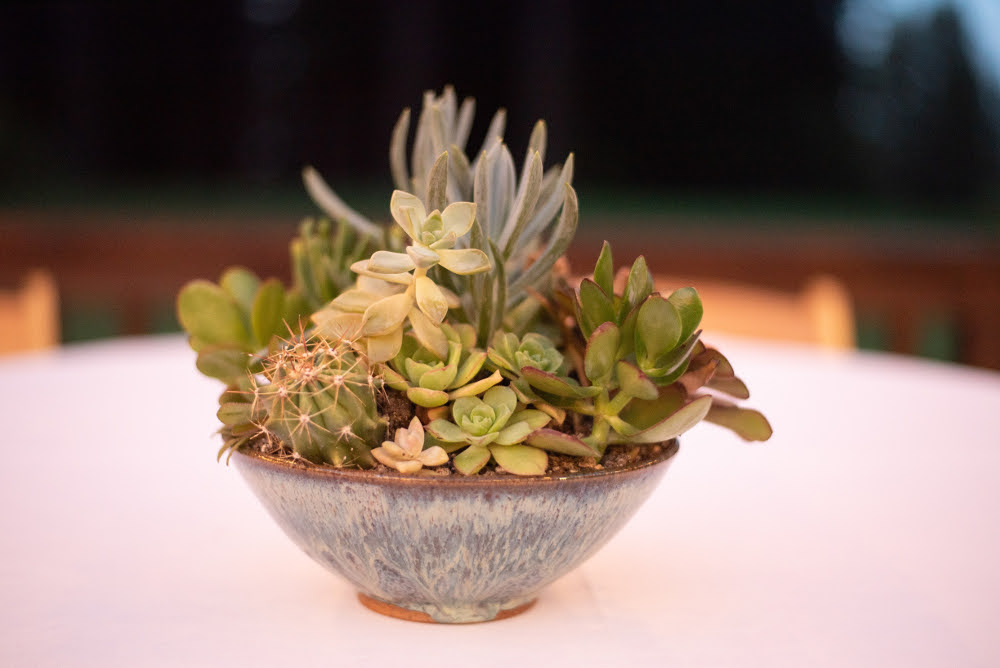
Photo by @wendyandgeorgephoto
Portable Piano
We wanted our best man to play the piano during the ceremony. The only problem was that we had to use a portable piano that wasn’t plugged into an electrical outlet.
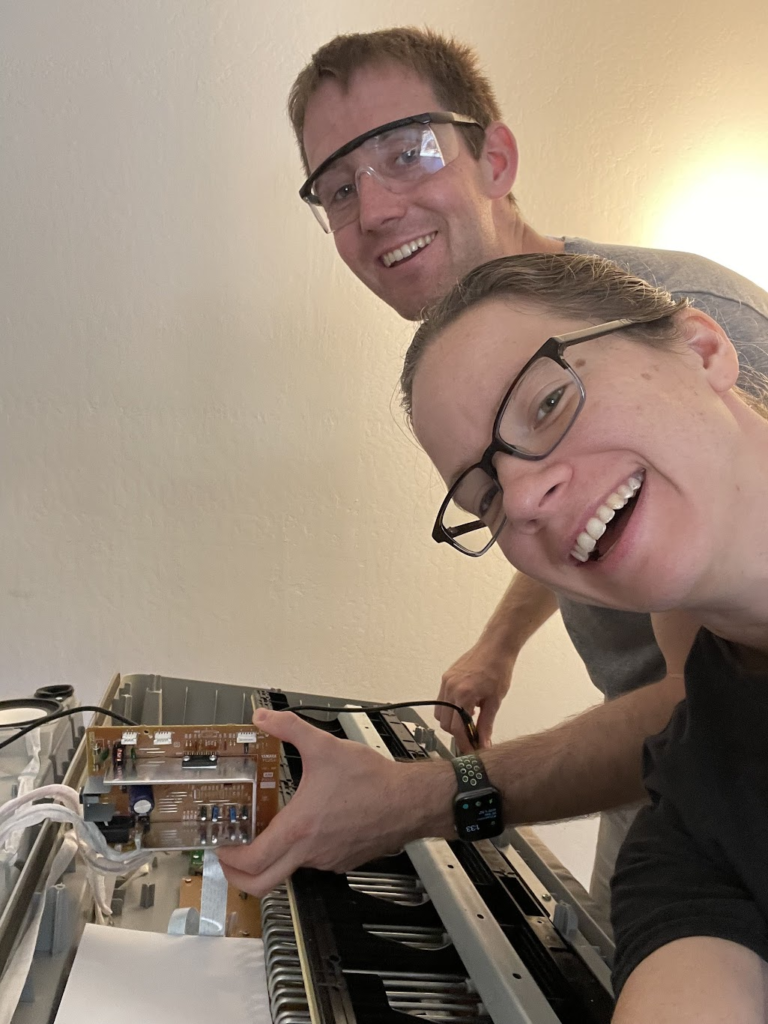
Thankfully, we were able to use the best man’s electric keyboard, but said electric keyboard had to be modified to use a portable power source. After getting on YouTube, including watching a delightful video of a man playing music outdoors, we determined that building a battery was pretty straightforward. The piano takes 12v, so I ordered a 12v, 20 Ah battery.
The battery life in hours is its capacity (in amp-hours) divided by the current draw (in amps). The current draw is watts / volts, which for us is around 40 W / 12 v ~ 3.33 amps. Thus we expect the piano to last 20 Ah / 3.33 A ~ 6 hours. We figured that should be more than plenty.
I also ordered a charger, and a Yamaha piano wall wart. I cut the plug off of the wall wart and connected that, plus a fuse, to the battery:

(with lots of protective electric tape – don’t want to get shocked.)
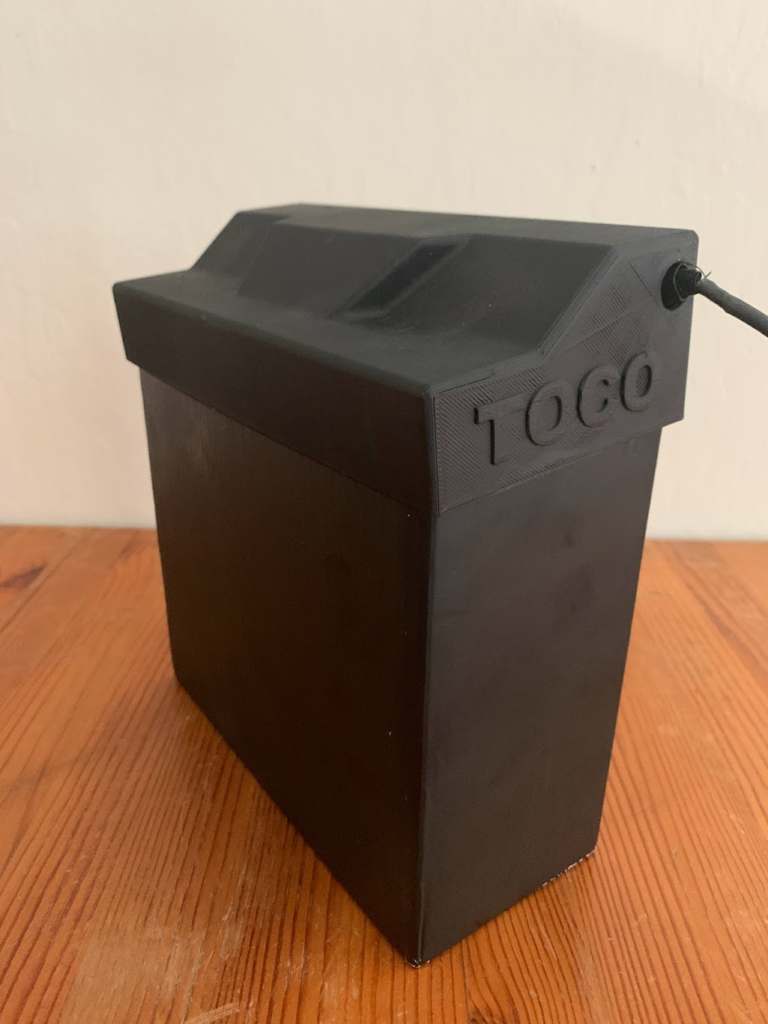
We put the battery in the cardboard box it came in, spray painted it black, and 3d-printed a nice little cover:
We additionally 3d-printed a little wedge so that the battery could sit on the X-frame stand that supports the piano. Unfortunately, I forgot to get a photo of that.
And then there was the problem that the piano was initially dead after we borrowed it. After much troubleshooting, my partner’s internet investigations suggested that we replace one particular capacitor that was known to wear out on this brand of electric keyboard. So (with permission) we ordered it, took the piano apart, and replaced the capacitor.
Ring Box
We used the 3d printer for other things as well! My partner printed a wonderful ring box whose design she found:
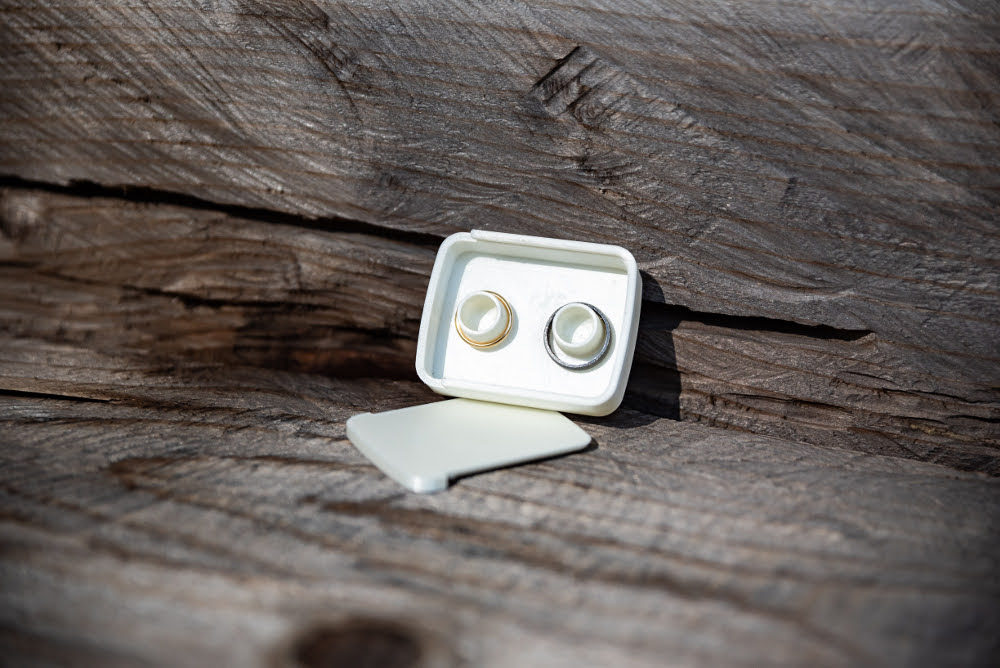
Photo by @wendyandgeorgephoto
Our names are inlaid on the other side.
Homemade Desserts
You know what’s harder than making desserts for your own wedding? Transporting them to the wedding.
Enter – the Macaron Transport Vehicle (MTV). My partner is fantastic at baking macarons, and has spent something like 10 years perfecting the recipes. She baked the macarons, and also came up with the method for getting them to the venue.
Each MTV consisted of an Ikea cooler bag with a cooler-bag-bottom-sized ice pack. This could be loaded with trays of macarons, with 3d-printed spacers to allow for tray stacking. The macarons made it safe and sound, and cold!
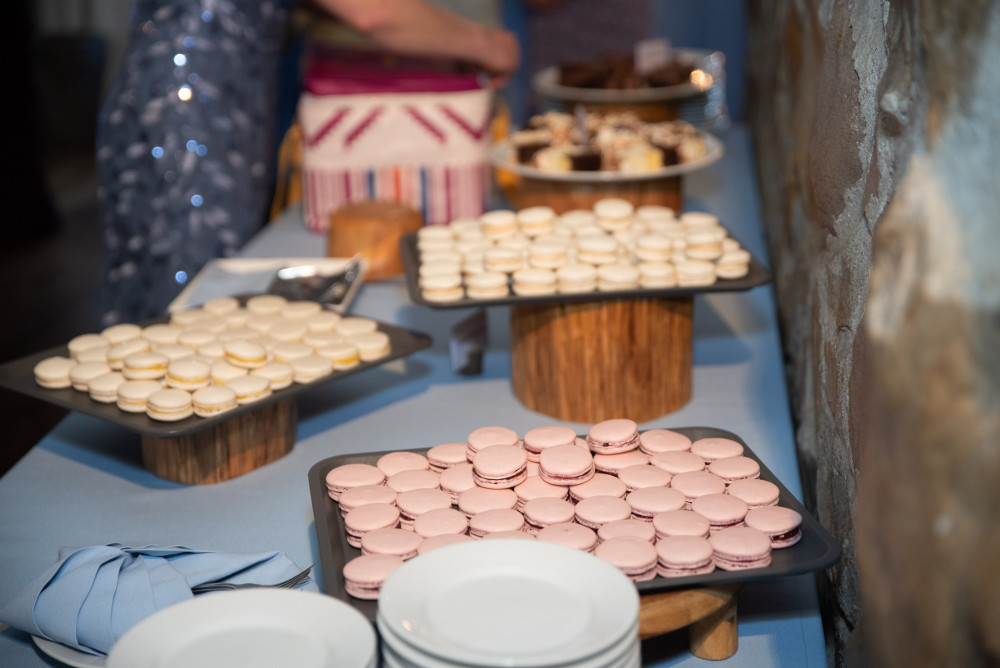
Photo by @wendyandgeorgephoto
Making the macarons was a 3-day process. The fillings were made on Day 1, the shells on Day 2, and they were assembled on Day 3.
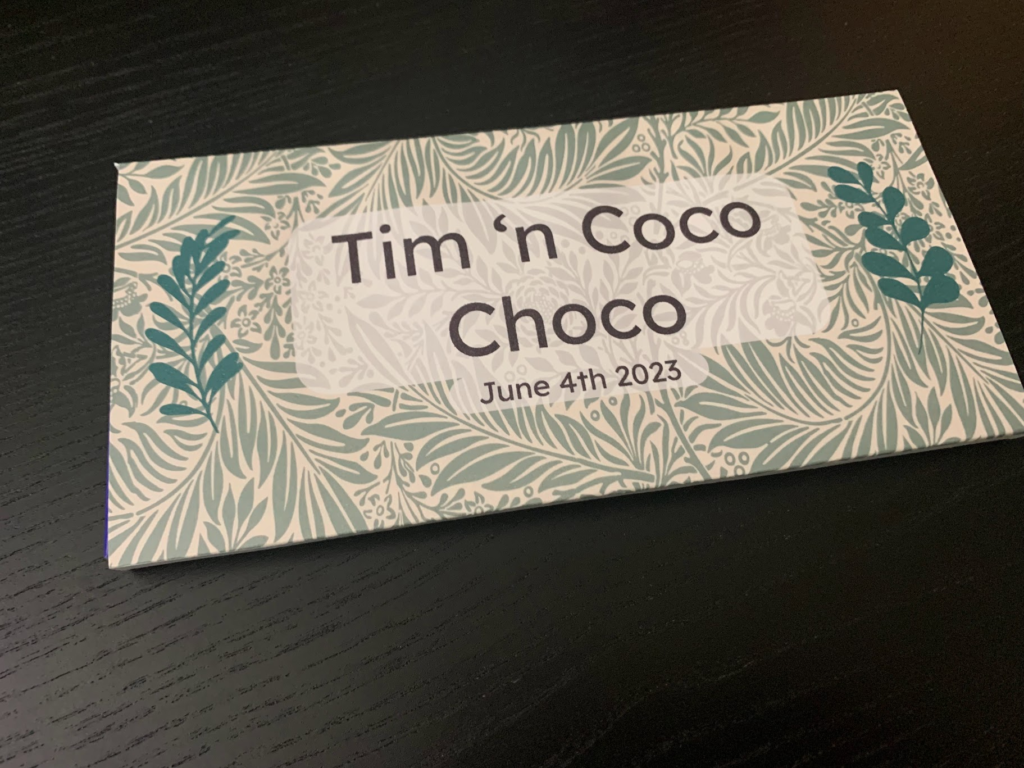
Wedding Favors
We wanted to have something for our guests to take home with them. We thought about giving out succulents, but figured those would be hard to travel with, and maybe guests wouldn’t want them. We figured that pretty much everyone likes chocolate.
There are services that let you make your own custom chocolate wrappers. We tried a sample or two and weren’t really blown away by the chocolate itself. So we decided to just buy chocolate bars that we liked and make our own basic sleeves:
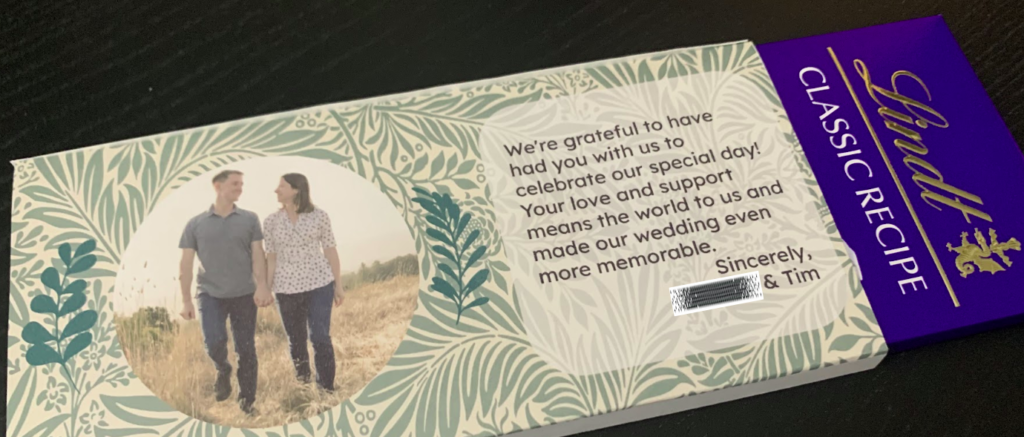
These were made in Keynote, and were printed on heavier paper.
Funny story about the text on the back. I initially wrote something much longer, and my partner had the great idea to use ChatGPT to consolidate it a bit. It worked really well, with some minor manual adjustments.
We then tried asking it to add some chocolate puns. ChatGPT 3.5 was decidedly terrible at adding puns. It basically just inserted “choco” into the text in random places. Ah, well.
Website
Lastly, rather than use a wedding website service, I figured I had my own website already, and could just add to that. It was just a simple page based on the same HTML5 Up template that I use for my main website today. Per a friend’s suggestion, I used Leaflet and Open Street Maps to display the location of the venue and the hotel. This was also the page that guests could access the RSVP Google Form from.
Conclusion
We had a wonderful wedding, with wonderful guests and a lot of wholesome, positive energy. Things went incredibly smoothly, and the worst thing about it was how quickly it all flew by.
I think the little touches that we added made the wedding feel more personal.